SANTA ROSA GOLF & BEACH CLUB’S
Hole by Hole
Santa Rosa Golf & Beach Club completed their multi-million-dollar course renovation in late October of 2021. Bergin Golf Designs lead this milestone project. Santa Rosa Golf & Beach Club’s new design is challenging for the most skilled golfers, yet fun and friendly for the recreational player. Greens complexes offer a wide variety of options for recovery and boast ample playing areas.

HOLE BY HOLE RENDERINGS
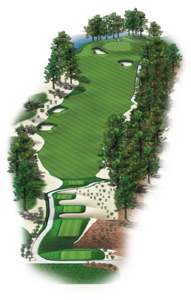
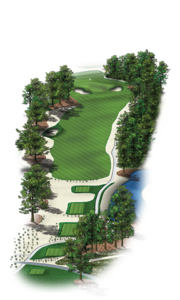
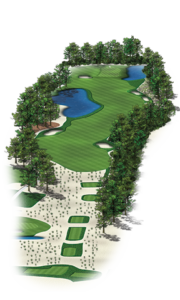
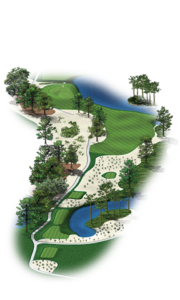
HOLE 1
PAR 5
Black 508 | Blue 476 | White 455 | Gold 420 | Silver 390 | Green 353
The very first hole on the Santa Rosa golf course is a par 5. Your first introduction to the golf course is wide and open, with meandering sandy waste areas running along the left side. This sand defines the space between the first hole and the seventh hole, simultaneously acting as a target as it rises between the holes. With a brand new pond framing the green, players with aggressive shots will want to avoid the left side.

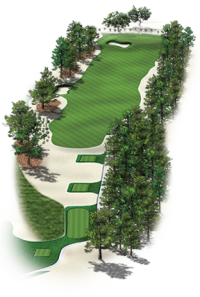
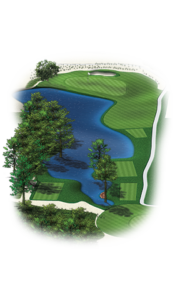
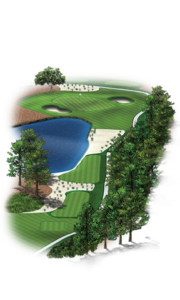
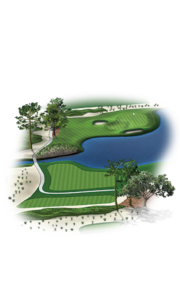
Hole 2
PAR 3
Black 190 | Blue 170 | White 162 | Gold 153 | Silver 138 | Green 101
The par 3 Hole 2 requires a trusty tee shot you can depend on to send your ball flying over both a pond and large patch of native grass onto the fairway or extended green. The greatest hazard golfers will want to avoid is the left bunker flanking the green.
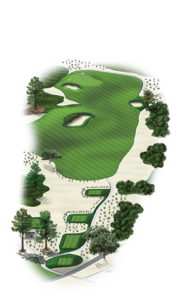
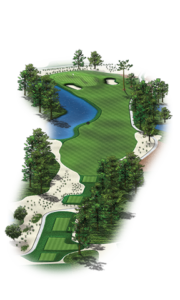
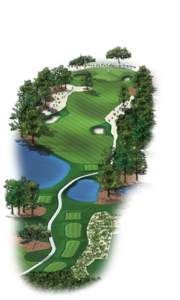
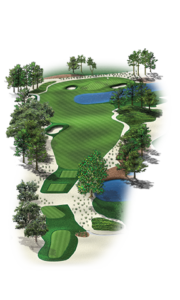
Hole 3
PAR 4
Black 430 | Blue 390 | White 367 | Gold 330 | Silver 305 | Green 273
The putting green sits high on the horizon as you approach Hole 3. With a mix of sandy waste area and pines running along the left side, a target bunker halfway down the fairway marks where the third and sixth hole fairways link. Three different tee boxes allow this lengthy par four to be presented from a slightly different angle and position.
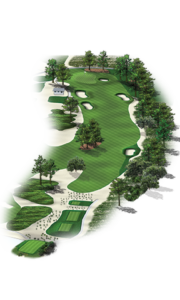
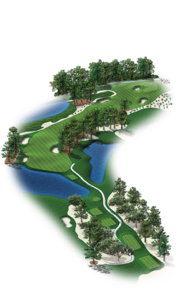
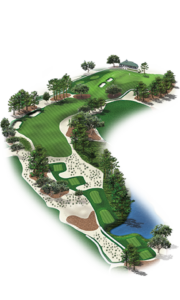
Hole 4
PAR 4
Black 372 | Blue 357 | White 347 | Gold 331 | Silver 305 | Green 260
Hole 4 takes the golfer to the beach, both figuratively and literally! With breathtaking views of the Gulf of Mexico and sandy dunes encapsulating the fairway, this is one of the highest spots on the golf course. This par 4 hole has a fairway connecting to the fifth hole near the upper fairway. Golfers will want to avoid the right fairway bunker.
Hole 5
PAR 5
Black 488 | Blue 474 | White 425 | Gold 410 | Silver 394 | Green 355
The second of the two holes with a gorgeous view of the Gulf of Mexico, the par 5 Hole 5 connects to the fourth hole via the fairway. This hole requires your longest drive in order to get your ball as close to the expanded putting green as possible. This hole has a smattering of pines and sandy waste areas to add to both the natural beauty and the challenge. An attacking approach from the left side will need to be confidently struck, and must carry a partially blind no man’s land when taking a direct approach to the flag.
Hole 6
PAR 4
Black 386 | Blue 353 | White 341 | Gold 320 | Silver 296 | Green 268
The medium length Hole 6 is a par 4, with brand new tees and sandy waste on the left hand side. The towering pines just short of the green are the greatest challenge of this hole. Golfers will want to play safely to the left, with a second shot working around the trees. For those willing to bet on their drives, you can take a more risky line off the tee in order to open up the angle on the approach, making any hole location more accessible.

Hole 7
PAR 4
Black 467 | Blue 430 | White 383 | Gold 357 | Silver 315 | Green 280
Every golf course needs a long, demanding par 4 as part of the day’s test, and at the Santa Rosa golf club, Hole 7 is that difficult hole. Any overly cautious drive will be swallowed by the sandy waste ridgeline on the left of the fairway. Two new forward tees help offset some of the distance requirements that this hole demands of its players.
Hole 8
PAR 3
Black 185 | Blue 177 | White 155 | Gold 145 | Silver 136 | Green 86
A large water hazard is the focal point of the par 3 Hole 8. This, plus the large sandy waste area framing the green and chipping area, makes this a challenging hole. This hole offers new expanded tees to fit players’ games of all skill levels.
Hole 9
PAR 4
Black 374 | Blue 346 | White 316 | Gold 302 | Silver 264 | Green 226
The par 4 Hole 9’s pond has been expanded further into the fairway, narrowing your landing area and forcing you to be strategic off the tee. With a smart club selection and precise approach show that splits two greenside bunkers, you’ll be in the clear. A safe miss on the approach shot is long right.
Hole 10
PAR 4
Black 376 | Blue 344 | White 316 | Gold 302 | Silver 264 | Green 233
On the edge of the pond sits the par 4 Hole 10, visible from the clubhouse. Hole 10 runs the opposite way of Hole 9 since the pond along the green is now on the right side. The surface of the putting green is long and thin, demanding the utmost accuracy and nerve. Cautious players should note the wide bailout on the left side.
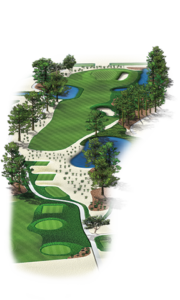
Hole 11
PAR 5
Black 550 | Blue 510 | White 495 | Gold 465 | Silver 413 | Green 381
Hole 11 is the longest par 5 on the Santa Rosa golf course. Golfers will notice that the land rises and falls along the western border of the hole, while the fairway winds its way from tee to green. Stare down the fairway from the raised vantage point at the tee to contemplate your move, surveying the trees, bunkers and ponds along the way.
Hole 12
PAR 3
Black 212 | Blue 191 | White 171 | Gold 143 | Silver 131 | Green 112
Hole 12 is the longest par 3 on the golf course, with a long shot to a small green across three bunkers and a pond. The wide green allows lower trajectory shots to finish on the surface, but this hole is still trickier than it seems.
Hole 13
PAR 4
Black 396 | Blue 367 | White 342 | Gold 328 | Silver 279 | Green 218
Like many of the holes before it, Hole 13 opens up on the left side with a smattering of sandy dunes. Golfers will find both some of the highest and lowest ground on the golf course at this par 4 hole. Climbing from the landing area to the clubhouse, the second shot enjoys a rare uphill approach.
Hole 14
Par 5
Black 508 | Blue 476 | White 455 | Gold 420 | Silver 390 | Green 353
An L-shaped dogleg par 5, Hole 14 is filled with bunkers and extensive water features. Overly aggressive hitters will want to be wary of their shots to ensure they don’t carry the fairway and hit their balls onto the 18th tee by playing too aggressively.
Hole 15
PAR 4
Black 358 | Blue 329 | White 298 | Gold 280 | Silver 242 | Green 214
Those approaching Hole 15 will find that the previous holes rewarded players with the power game. But at this point in the golf course, precision becomes paramount. Proper placement off the tee is imperative because any shots that are too long or too short will be a hindrance. The putting surface is long and thin, running along the edge of the pond, requiring a solid feel for the green speed.
Hole 16
PAR 3
Black 143 | Blue 128 | White 112 | Gold 100 | Silver 88 | Green 83
Control is key on the par 3 Hole 16. Especially when compared to the incredible length of Hole 12, the par three sixteenth hole by contrast is about tight execution, nerve and fun. Players of every level can find success on this hole with the right strategy, including keeping a close eye on the putting green, which breaks toward the water’s edge. On a windy day, players will want to be extra careful of their club choice.
Hole 17
PAR 4
Black 341 | Blue 321 | White 292 | Gold 280 | Silver 228 | Green 217
Hole 17 offers the opportunity for a bit of mystery. The par 4 is lined with sandy waste areas on either side of the fairway. Players should take notice of the speed slot that cuts in close to the bunker with visibility over the rise.
Hole 18
PAR 4
Black 431 | Blue 411 | White 366 | Gold 333 | Silver 295 | Green 266
For a final challenge, Hole 18 is a par 4 that features a dogleg that requires precise placement off the tee. The approach to the green is flanked on either side by two big oak trees, with one large bunker on the fairway. The corner is attainable here, allowing persistent players a strong finish.
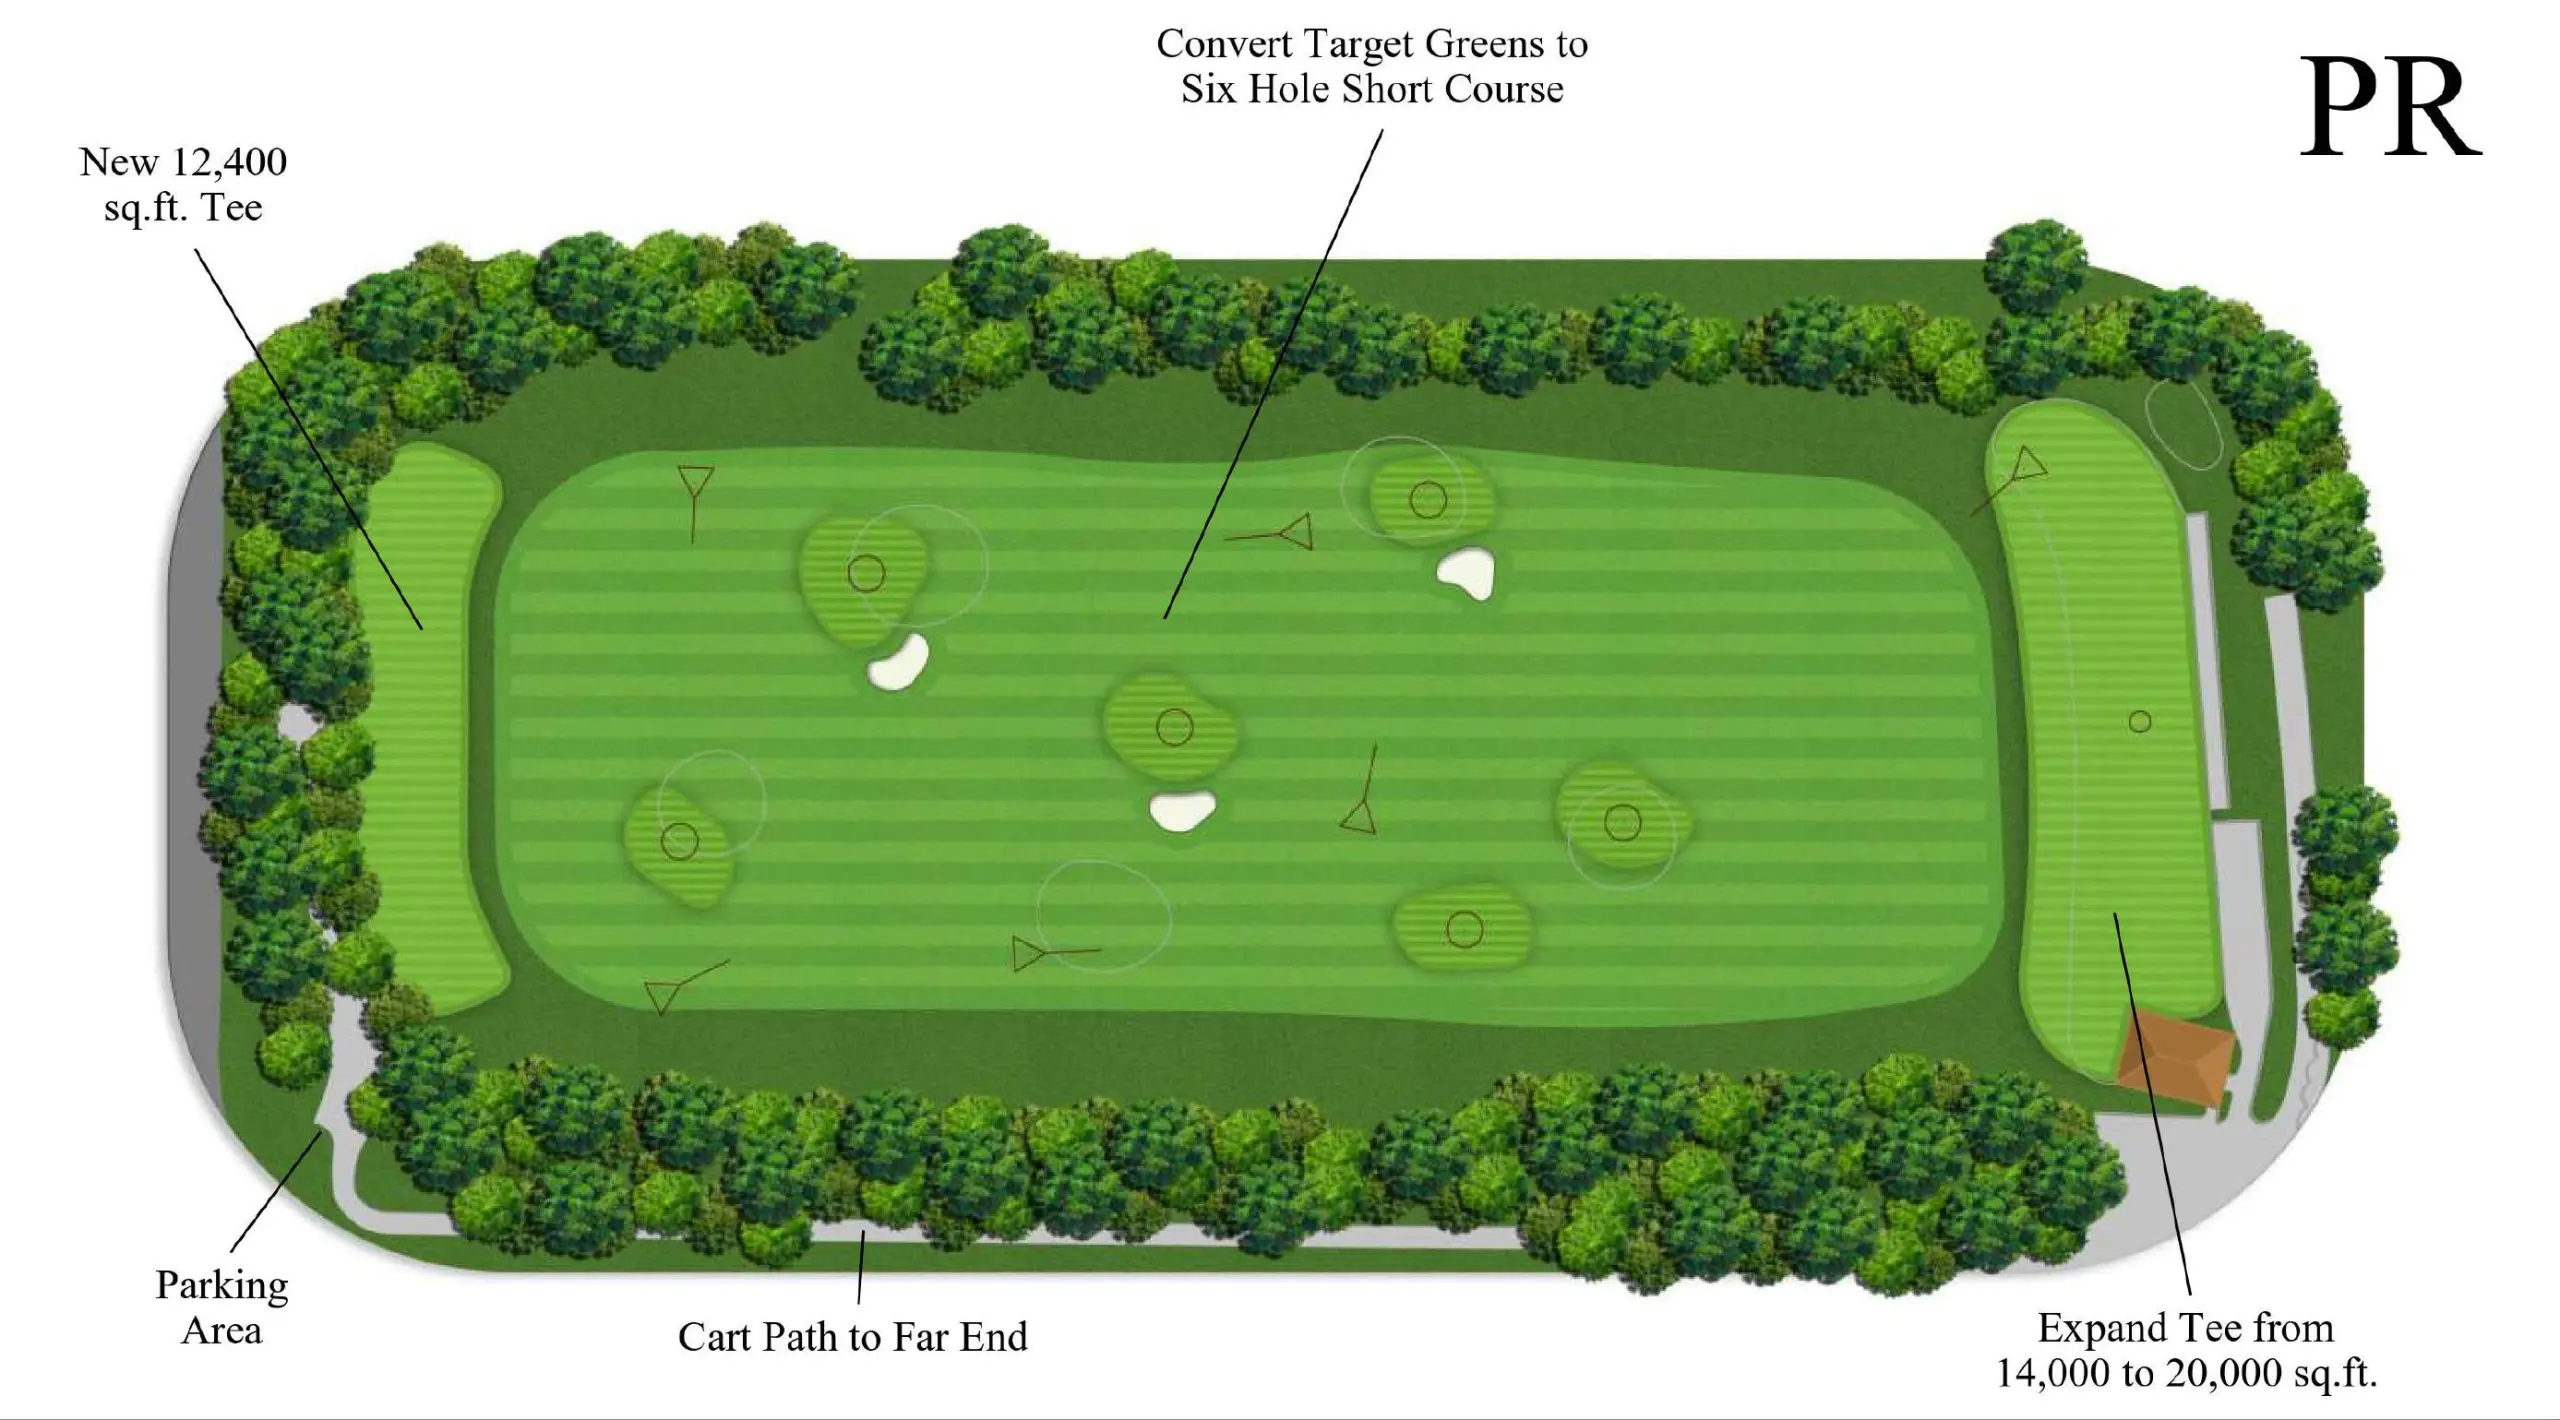 Practice Golf Driving Range and Short Course
Members will be delighted by the Practice Facilities at (delete the) Santa Rosa Golf & Beach Club, including the golf driving range and Short Course. Here, members and their guests can work towards improving their game and enjoying golf in a low stakes environment.
The Short Course, known as The Loop, has improved turf and enlarged tee boxes located within the driving range. Yardages range from 45 – 85 yards, mimicking actual golf course scenarios; this makes the Short Course a perfect place to focus on short game improvement and have some fun after you’ve worked on your swing mechanics.

Short Game Area
Situational chipping and pitching practice is the name of the game for Santa Rosa Golf Club’s short game area. This is the perfect place to practice situations one might find themselves in on the 18-hole championship golf course. The area features two practice bunkers and plenty of areas for chipping on this USGA-specified practice green.
Develop ball contact basics and hone your control on the greens. New golfers will feel comfortable introducing themselves to golf in this environment while veteran golfers will enjoy having a space to fine tune their fundamentals. The golf club’s expert instruction makes this space all the more valuable to members looking to improve their skills.
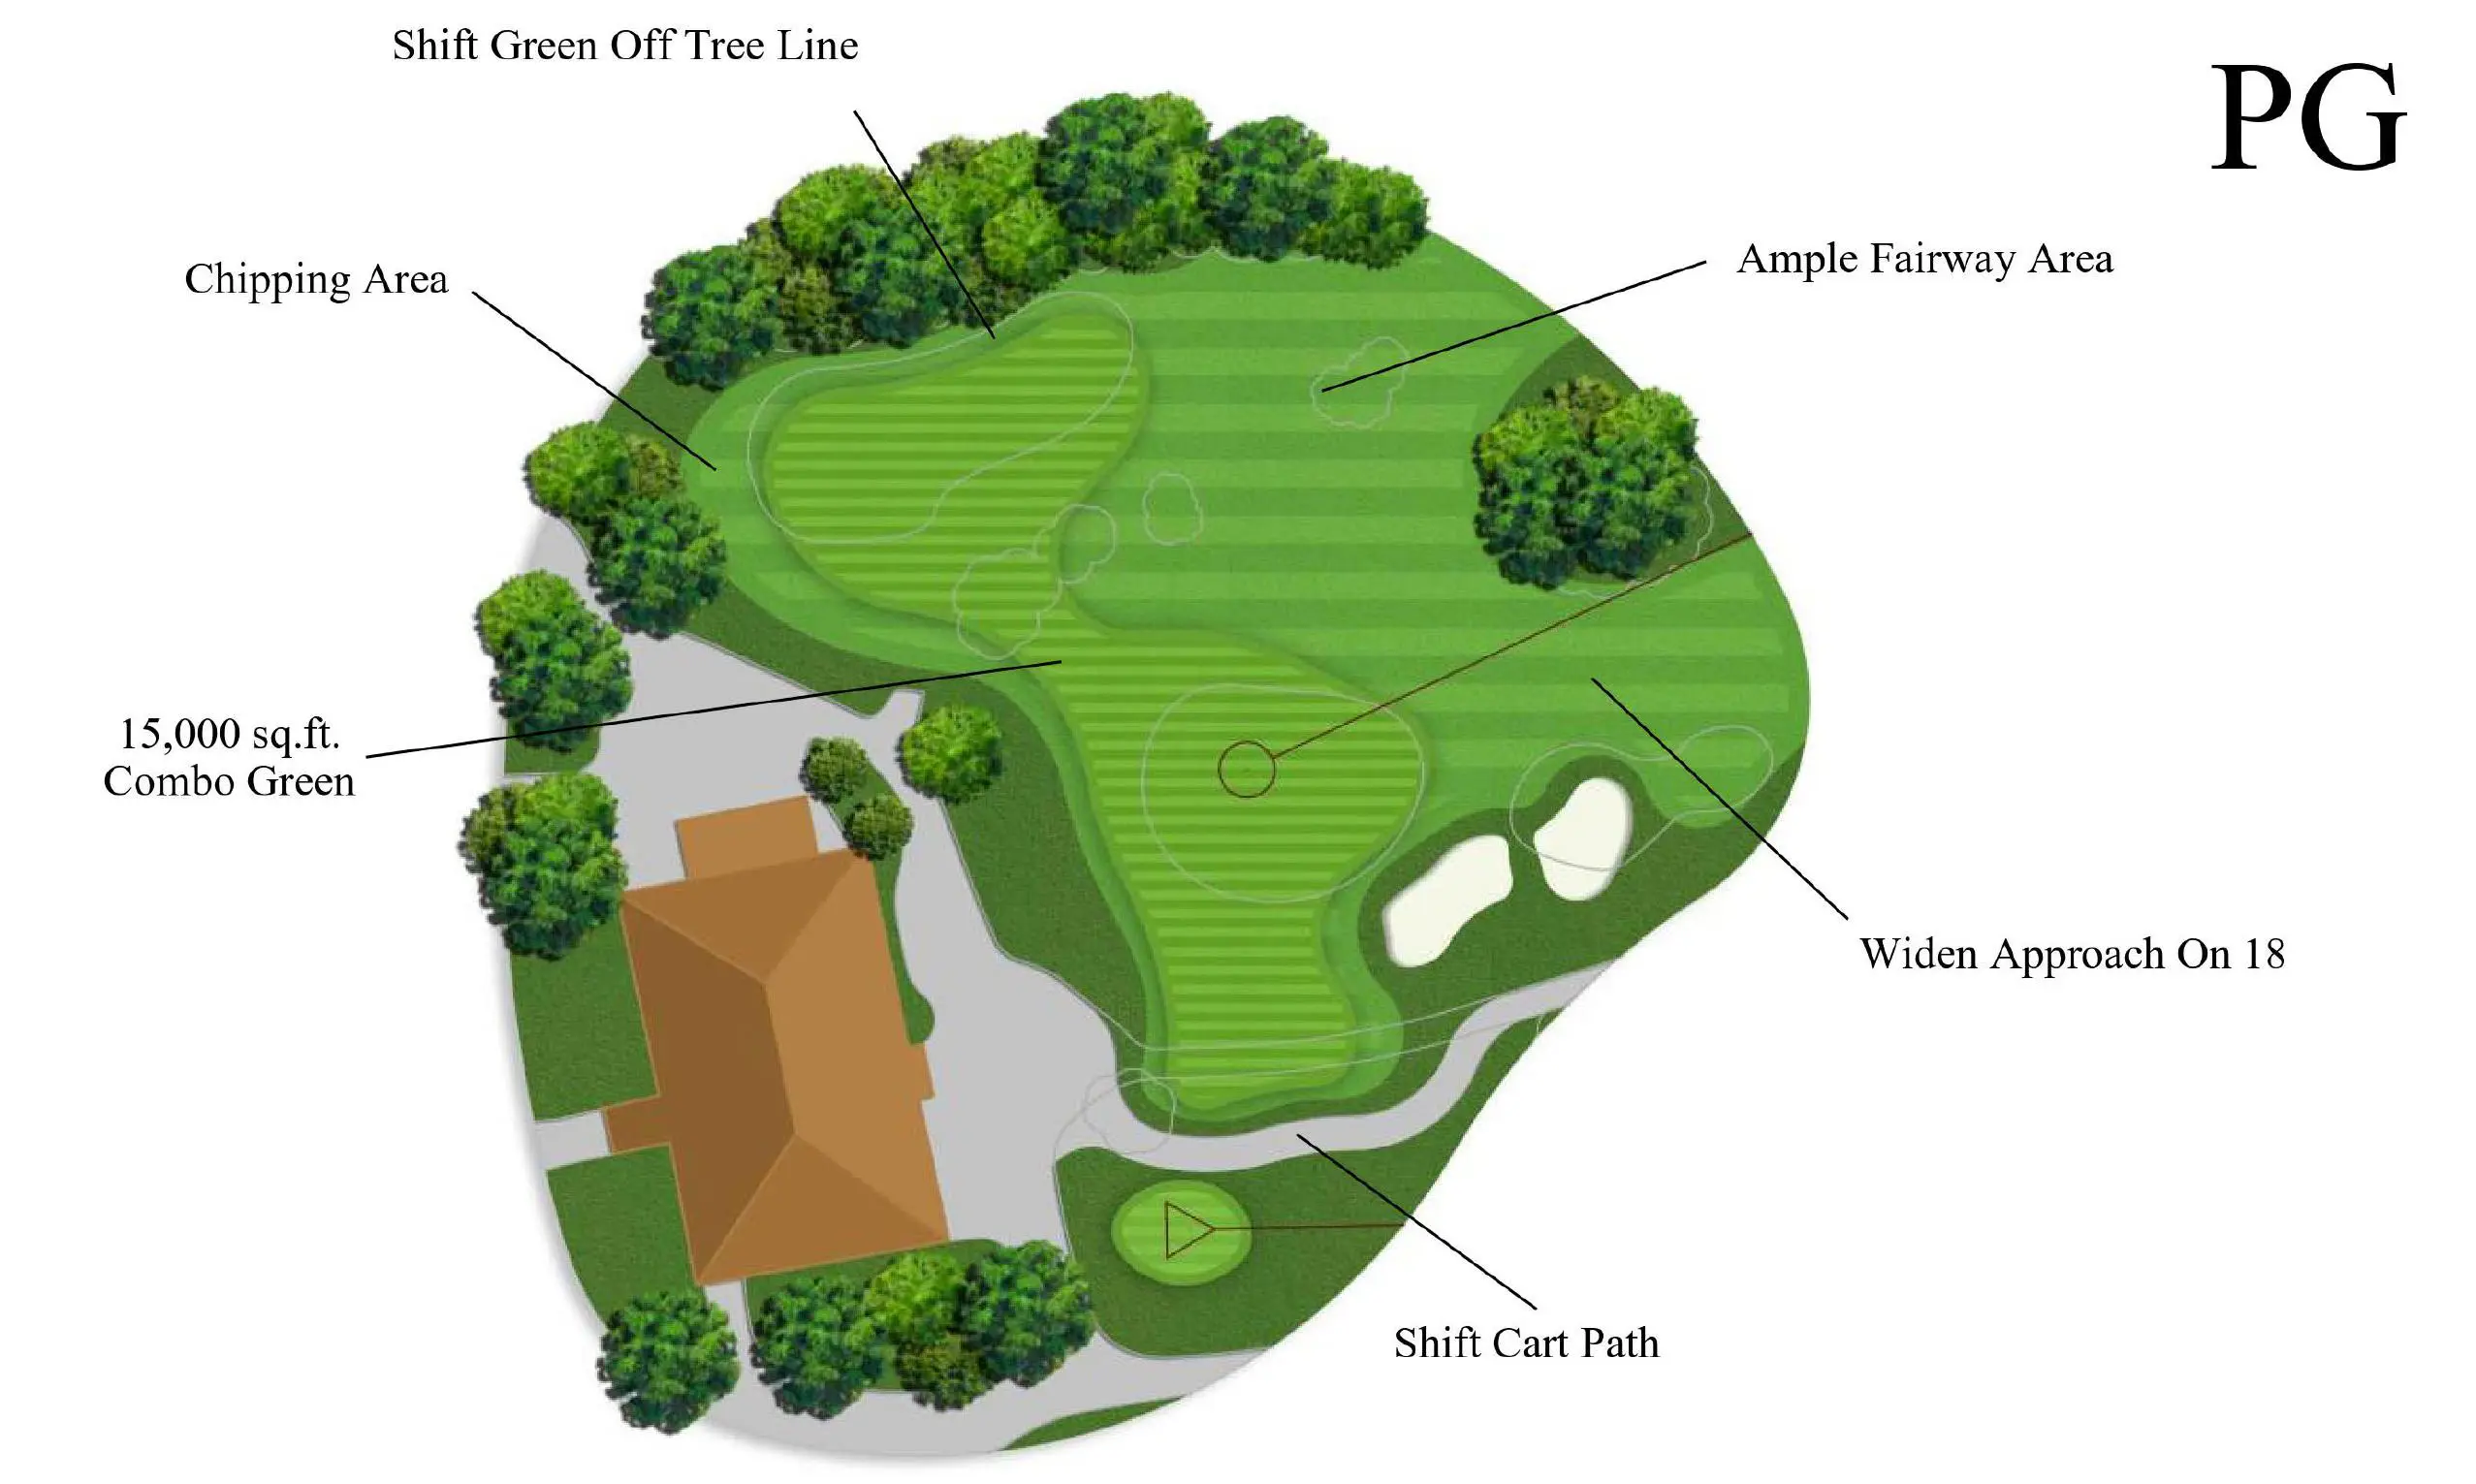
Putting Green
Located behind the Clubhouse near the 18th hole, the Putting Green offers a scenic spot for golfers to hone their putting skills. Connected to the 18th green, this 15,000 square foot putting surface mimics the undulations you’ll see on the golf course. This putting green can also serve as a chipping practice area thanks to the ample fairway grass along the tree line.